
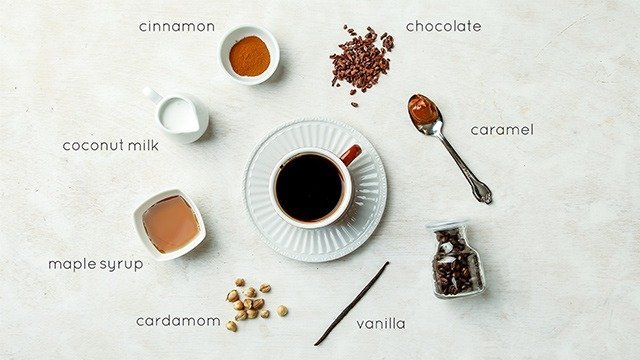
To make a balanced cup, brew 2 tablespoons (10 grams) of medium-ground coffee with 6 fluid ounces (180 ml) of hot water off the boil for 4 minutes in a dripper. When people ask about your home brewing method, this standard pour-over ratio delivers the cleanest cup with everyday kitchen gear.
Equipment and supplies for pour-over coffee
Photo: procoffeegear.com on Google
You don’t need an expensive setup to make a fresh morning brew. Gather these items on your kitchen counter before starting:
- Whole coffee beans or fresh medium-ground coffee (roasted within the past 30 days)
- A pour-over dripper (cone or flat-bottom style)
- Paper filters sized to match your specific dripper cone
- A standard kettle (a gooseneck spout gives the best water control)
- A burr grinder (blade grinders smash beans unevenly, creating bitter powder)
- A digital kitchen scale or a standard 2-tablespoon coffee scoop
- Clean drinking water (filtered tap water works best)
- A coffee mug or heatproof glass server
A standard kitchen measuring spoon works if you lack a scale, but pre-ground espresso powder won’t work because it clogs the paper immediately.
Brewing coffee step-by-step
- Bring 12 ounces (350 ml) of filtered water to a boil, then remove it from the heat for 30 seconds to settle near 200°F.
- Place a paper filter into your dripper cone and rinse it thoroughly with 2 ounces of hot water to wash away the papery taste, then dump the rinse water from your mug.
- Grind 20 grams (about 4 level tablespoons) of coffee beans to a medium texture resembling coarse sand, and pour it level into the wet filter.
- Pour 50 grams (about 3 tablespoons) of water directly onto the dry grounds in a slow circle, completely wetting them. Tip: Let the grounds sit for 30 to 45 seconds to puff up; this bloom stage releases trapped gas so the water extracts flavor evenly.
- Pour another 150 grams of water slowly in concentric circles, moving from the center outward while avoiding the paper walls. Careful: Pouring directly against the paper filter makes water run straight down the sides without touching the grounds, leaving your brew weak.
- Add the final 100 grams of water once the liquid level drops halfway down the cone, bringing total water to 300 grams (about 10 fluid ounces).
- Allow all the water to drip through the bed until the surface looks flat and dry, which should take between 3 and 4 minutes total.
Adjusting for brew methods and roast levels
Adjust your brew to your preferences. Grind coarser for bitterness; grind finer for sourness. Dark roasts dissolve faster and need lower temperatures.
| Brewing Situation | Time and Grind Setting | What Changes | What to Watch |
|---|---|---|---|
| Light roast beans | 3.5 to 4.5 minutes / Fine-medium | Needs hotter water (205°F) to pull deep flavors | Slow draw-down through the filter |
| Dark roast beans | 2.5 to 3.5 minutes / Medium-coarse | Extracts quickly; needs cooler water (195°F) | Dark foam turning pale or chalky |
| Standard French press | 4.0 minutes steep / Coarse | No paper filter; retains bean oils | Sediment settling before you press |
| Double batch (2 mugs) | 5.0 to 6.0 minutes / Coarse-medium | Double the grounds and water volume | Water backing up near the rim |
It’s safer to start with less coffee grounds and add more on your next cup than to brew a heavy batch you can’t drink.
Signs of a good brew
A balanced cup smells sweet and bright, showing a clear, deep amber color in the mug. It tastes smooth across your tongue without making your mouth feel dry.
Serving standards and cleanup
For healthy adults, the FDA guideline on safe caffeine intake is up to 400 milligrams per day, which equals about four standard 8-ounce cups of brewed coffee.
After brewing, discard the filter and grounds. Rinse the dripper immediately to prevent oil buildup. Wash your kettle and server weekly.
Other ways to make coffee
French press immersion
This method steeps coarse grounds in hot water for 4 minutes inside an open glass carafe. Pressing the metal mesh filter preserves natural coffee oils, creating a heavy, bold body for minimal gear cost.
Cold brew concentrate
Steep coarse grounds in room-temperature water for 12 to 18 hours inside a sealed glass jar. This extended soak produces a low-acid, mellow liquid that keeps in the refrigerator for up to two weeks.
Stovetop moka pot
Steam pressure pushes boiling water up through fine grounds in a metal chamber on the stove in 5 minutes. The resulting drink is thick and concentrated, mimicking espresso without an expensive machine.
Frequently asked questions
Can you brew coffee with boiling water?
While some prefer slightly cooler water to avoid over-extraction, boiling water doesn’t scorch coffee oils. Let your boiled kettle rest off the heat for 30 to 45 seconds so the water drops to the ideal range of 195°F to 205°F.
How much coffee do you use for one cup?
Use 2 level tablespoons (about 10 grams) of grounds for one standard 6-ounce cup of water. If you use a 12-ounce mug, double that amount to 4 level tablespoons (20 grams) for proper flavor balance.
Is it safe to reheat cold coffee in the microwave?
Yes, reheating is safe, but it alters the taste. A 45-second burst in a 1,000-watt microwave warms the cup, but heat breaks down remaining aromatics and turns the liquid noticeably more bitter and sour.
Why does my coffee taste sour?
Your coffee tastes sour because the grounds were under-extracted. Water passed through too quickly or wasn’t hot enough, leaving sweet flavors behind. Grind your coffee finer or pour your hot water more slowly next time.
How long do whole roasted coffee beans stay fresh?
Whole coffee beans are at their peak flavor within 30 days of their roast date, though they remain safe to consume much longer. After four weeks, oxygen stales the essential oils, which weakens the aroma and flattens the distinct flavor notes of your morning cup.
Conclusion
The trade-off between convenience and flavor is simple: pre-ground coffee saves two minutes of prep, but whole beans ground right before brewing give you a cleaner, sweeter taste every time. This manual method isn’t for someone who wants push-button speed before leaving the house, but it gives complete control over your morning mug. Pick good beans, measure your water, and adjust the grind size until the balance fits your personal palate.
Related guides